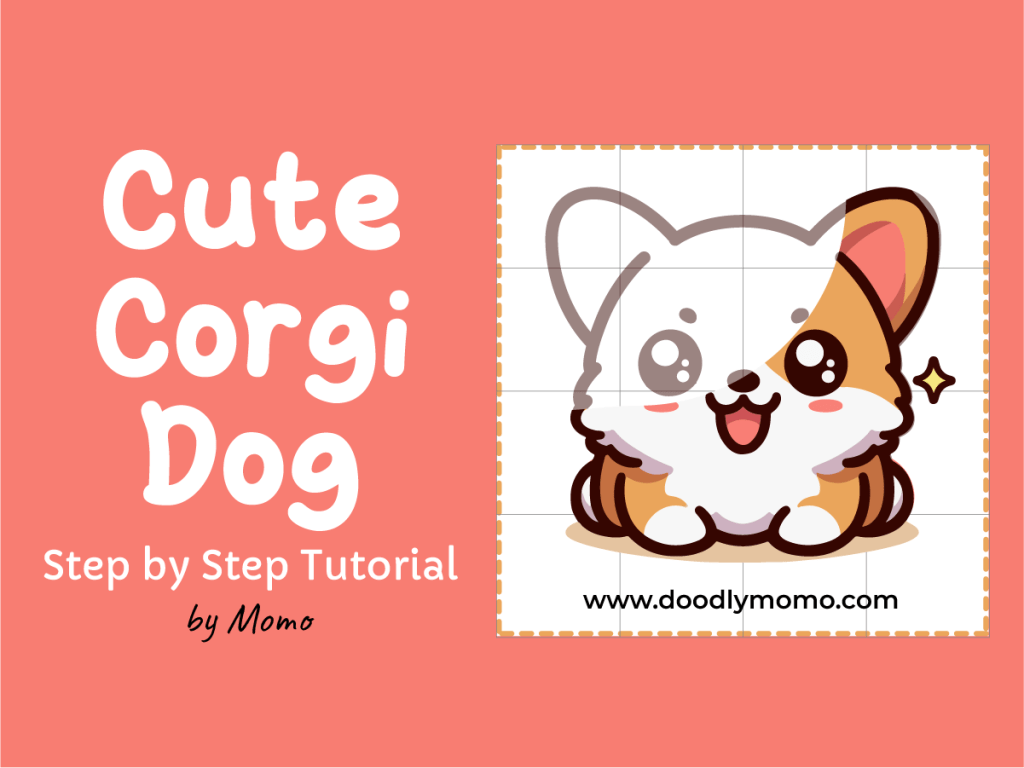
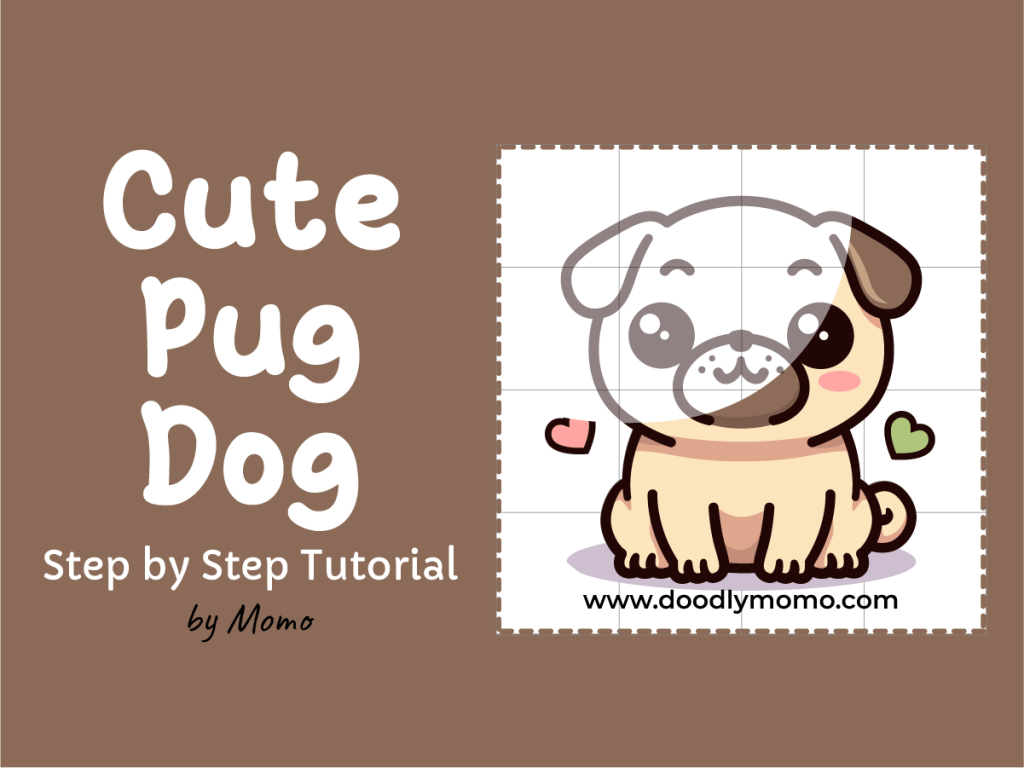
Step By Step Tutorial
Join us celebrate Mother’s Day! This heartfelt tutorial invites you to celebrate Mother’s Day by drawing a mother Pug and her puppy, providing clear, step-by-step guidance suitable for all skill levels. With free downloadable grid paper, it fosters creativity and joy. Ultimately, it aims to create cherished memories through art, highlighting the lovable bond between mother and pup. 🐶
Don’t forget to prepare your materials. Please see my post on how to use the Grid Line Method here. By the way we have prepared a free downloadable Grid Lined Paper that you can use, click the link to download a copy. Please note that these free downloads are intended for personal use only.💖
You may print it on an A4 sized paper or if you want to draw on a smaller scale, you may print 2 copies on one A4 sized paper.
Let’s Draw!
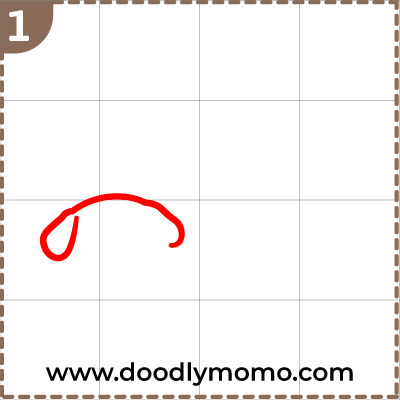
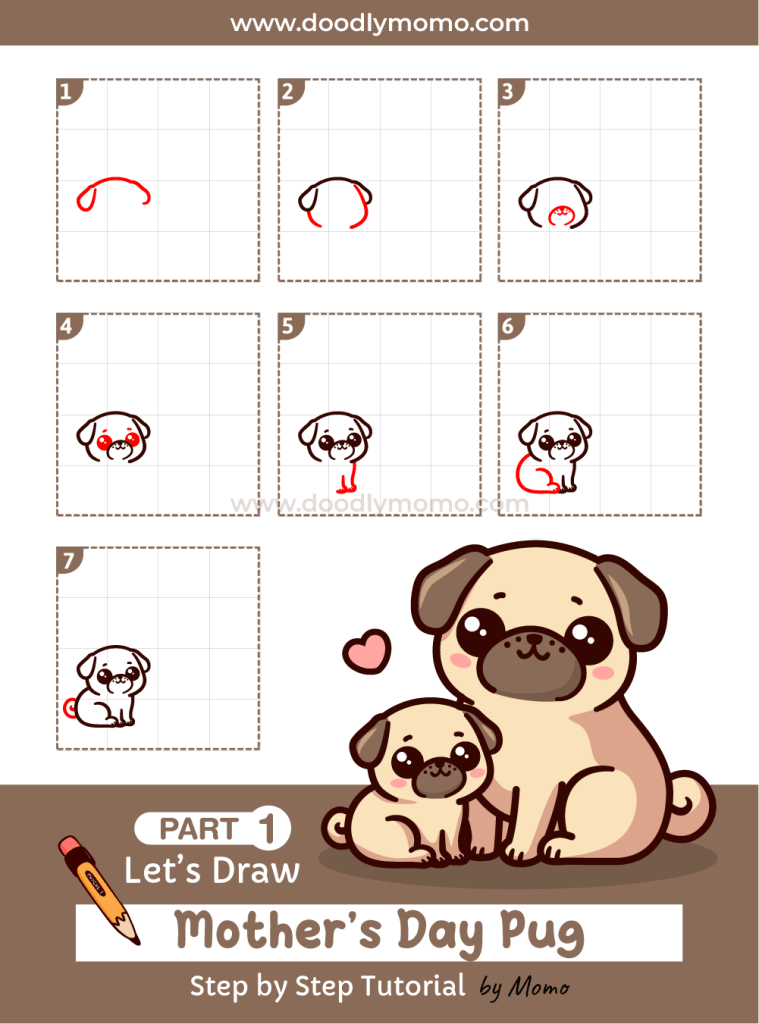
Step 1: Start by drawing a gentle curve that represents the top of the head, ensuring it has a smooth and rounded shape to give a natural appearance. Then, carefully draw two additional curves on either side of the head for the left and right ears; these curves should mimic the shape of the head and be proportionate in size to create balance. Take your time to refine the curves to enhance realism.
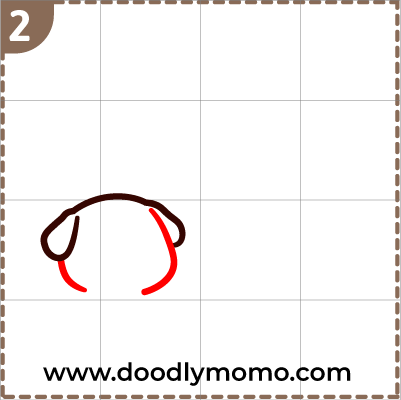
Step 2: Draw two curves for the head for the left and right part of the head. These curves should gently arc upward at the outer edges to create a smooth and natural outline. As you work on the curves, ensure that they are proportionate and symmetrical to maintain balance in the overall shape of the head. It’s helpful to keep in mind the features that will be added later, allowing for enough space as you sketch the curves, which serve as the foundation for the subsequent details. Take your time to refine these lines, as they play a crucial role in defining the character’s or subject’s expression.
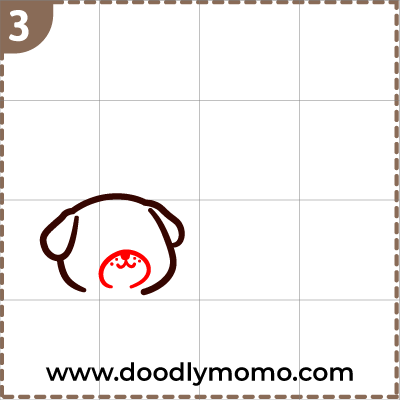
Step 3: Draw an almost closed circle for the snout, ensuring it’s proportionate to the overall head shape. Then, add a small oval for the nose, positioning it slightly towards the top of the snout to capture the characteristic Pug appearance. Next, draw two U-shape curves for the mouth, curving them upward to give the impression of a friendly smile. Don’t forget to add some dots for the whiskers of the Pug to add some details; you can place them evenly on either side of the snout, which will enhance the facial features and bring your drawing to life.
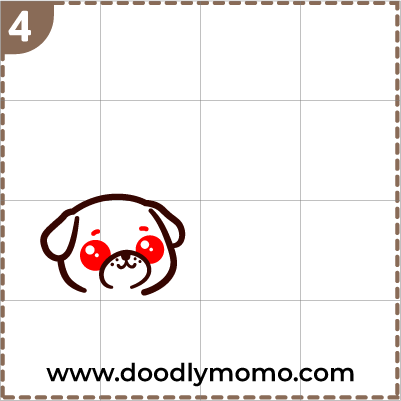
Step 4: Draw two small curve lines for the eyebrows, ensuring they have a natural arch to convey the expression you desire. Next, draw two circles for the eyes of the Pug, carefully positioning them to give the character a balanced appearance. To bring the eyes to life, don’t forget to add some glare; this can be achieved by sketching small white or light-colored spots within each eye, which will create a more vivid and engaging look. Consider the character’s emotion and moment, as the positioning of the glare can greatly influence how lively and expressive the Pug appears on the page.
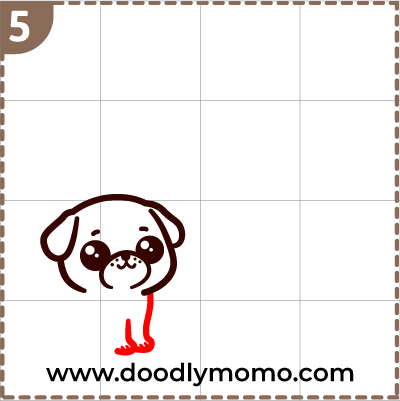
Step 5: Draw a smooth curve line for the right side of the body, ensuring it gently represents the Pug’s distinct rounded shape. Following this, carefully sketch the two front legs of the Pug, paying close attention to their placement and proportion to maintain balance. Be sure to add small curve lines for the paw details, capturing the adorable, compact nature of the Pug’s feet. To enhance the authenticity of your drawing, consider including subtle hints of fur texture and shading along the legs, which will bring more depth and character to your illustration. As you work on these elements, remember that every detail contributes to the overall charm of the Pug.
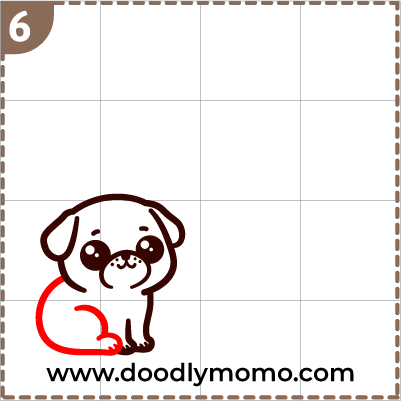
Step 6: Draw a big curve for the back of the puppy Pug, ensuring that it captures the adorable rounded shape characteristic of this breed. Then, connect a smooth line to the starting point of the back legs, paying attention to the transition between the body and legs for a natural look. Again, add some small curve lines for the paw details, making sure to highlight the tiny toes that give Pugs their unique charm.
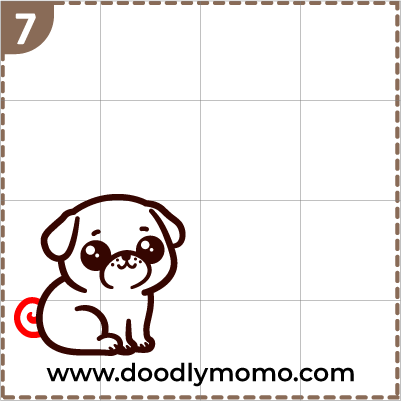
Step 7: Lastly, draw curve lines for the tail, ensuring they flow smoothly to give it a natural appearance; you might want to make the curves slightly thicker at the base and tapering off towards the end for added realism. Additionally, include another small curve line in the center to represent the tail’s distinctive features, capturing its essence and enhancing the overall design. This small curve will help to emphasize the shape and movement of the tail within the context of your illustration, adding a touch of flair and detail that will make your drawing stand out. See you on the next part!
Here are all the detailed steps for the part 1 of this special tutorial, ensuring that you can follow along without any confusion as you work through the process. Each step is meticulously outlined to provide clarity, allowing you to navigate through the procedure with ease and confidence. By following this structured approach, you will minimize the chances of making mistakes and increase your efficiency as you progress. Feel free to refer back to this guide whenever you need a reminder or a clearer understanding of the process.
Please click here to continue on Part 2!
📌We are in Pinterest too! Check us out and save our pins as reference! ♥
You can also check and buy vector files and images from our Adobe Stock link below, where you’ll find a diverse collection catering to all your creative needs, ensuring that you have quality visuals for any project, whether it be for web design, marketing, or personal use.
Thank you for reading! We hope you found this article insightful and enjoyable. Please have a look at our other step-by-step tutorials, where you can discover a variety of adorable dog breeds, including tips on training, grooming, and care. Whether you’re a seasoned dog owner or considering bringing a new furry friend into your home, our comprehensive guides are designed to help you along the way. Happy Drawing!


Leave a comment