“Pugs are like potato chips, you can’t have just one”
Step By Step Tutorial
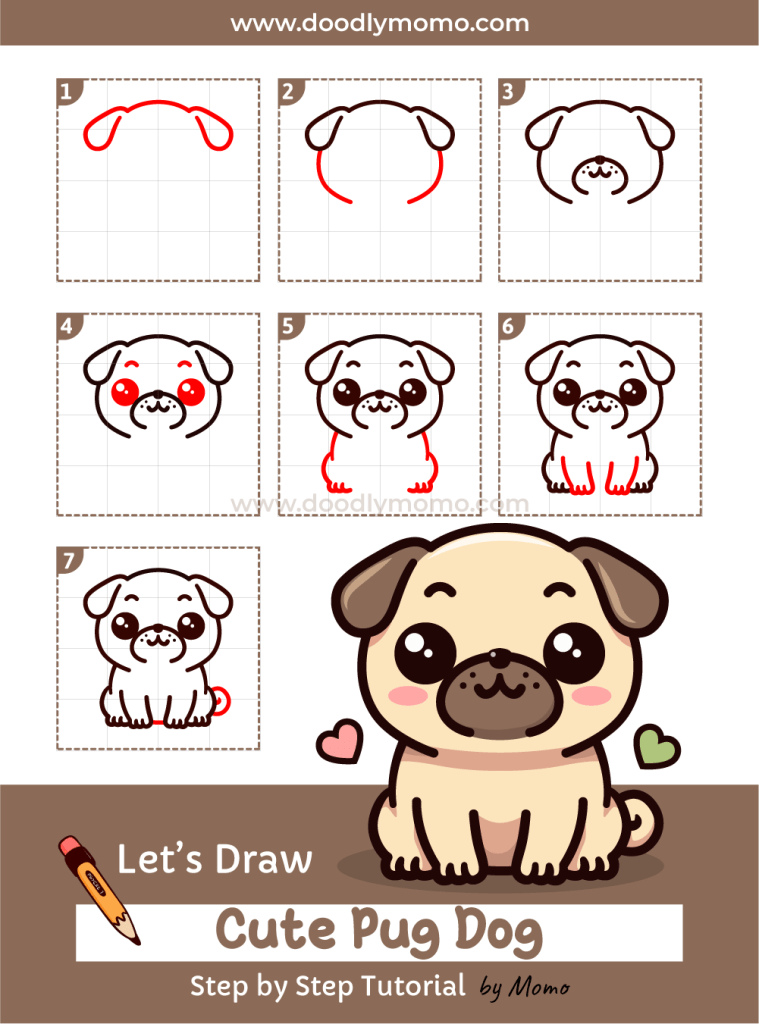
This encouraging tutorial inspires you to create a charming drawing of a Cute Pug in simple, easy-to-follow steps. With handy tips like using grid-lined paper for guidance, you’ll enjoy unleashing your creativity while perfecting your artistic skills. Plus, there’s a free download to enhance your drawing experience! 🐶
Don’t forget to prepare your materials. Please see my post on how to use the Grid Line Method here. By the way we have prepared a free downloadable Grid Lined Paper that you can use, click the link to download a copy. Please note that these free downloads are intended for personal use only.💖
You may print it on an A4 sized paper or if you want to draw on a smaller scale, you may print 2 copies on one A4 sized paper.
Let’s Draw!
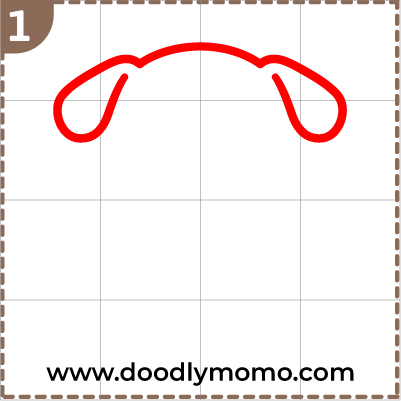
Step 1: Draw the ears and the top part of the head. Don’t forget to draw one grid at a time. Start your grid from the left side of the head. Then work your way to the right side of the face.
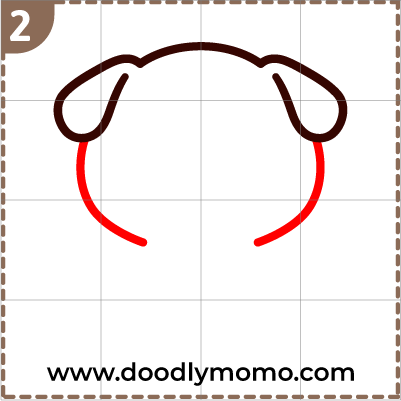
Step 2: Draw curve lines for both sides of the Pug’s cheeks, ensuring that the lines gently round outwards to capture the adorable fullness characteristic of this breed.
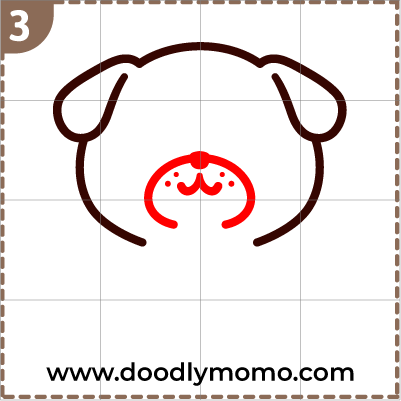
Step 3: Draw an almost complete oval for the snout, ensuring that it is proportionate to the rest of the face for a more realistic appearance. After establishing the shape of the snout, proceed to draw the nose at the top center of the oval, making it slightly triangular to capture its form accurately. Then, draw a W shape for the mouth, curving it gently to convey a friendly expression. To enhance the detail, add some dots for whiskers on both side of the snout. This will help bring your drawing to life by adding character and depth to the face.
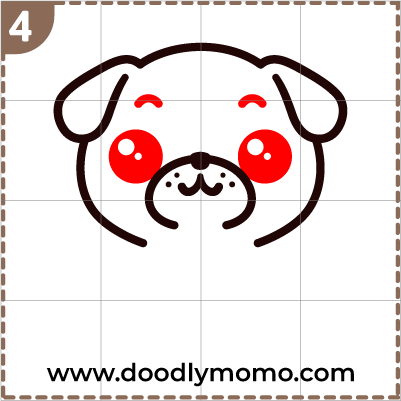
Step 4: Place the two rounded eyes but leave the white circles. These white circles are the glares of the eyes that give the image its cute factor. Not to worry, if you are having a hard time leaving out white circles, you can use white Sharpie or Posca acryllic paint markers. Just dab dots on the eyes and voila! You just made cutesy eyes. Draw 2 curve lines for the eyebrows too.
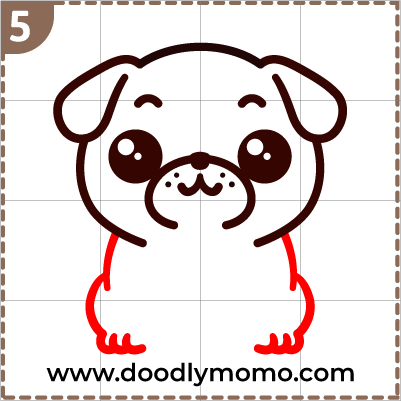
Step 5: Carefully follow the curved lines on each grid and draw the back legs, ensuring that you pay close attention to the angles and curves to create a natural and realistic appearance. Take your time to refine the shapes, adding muscle definition and proportions that align with the overall body structure. Consider how the legs will support the figure and visualize their movement, which will help in achieving a more dynamic pose. Remember, small details can greatly enhance the final look, so don’t hesitate to revisit and adjust as needed for the best results.
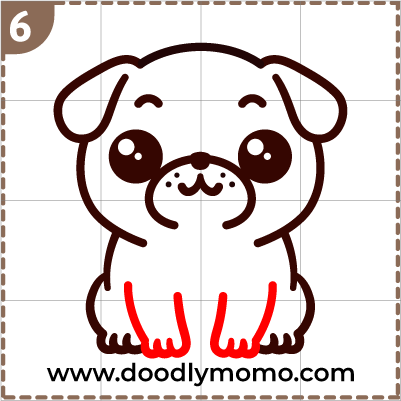
Step 6: Then draw the front legs, ensuring that they are proportionate to the body and reflect the correct posture of the creature you are depicting. Start by sketching the basic shapes for each leg, considering their angles and placement in relation to the body.
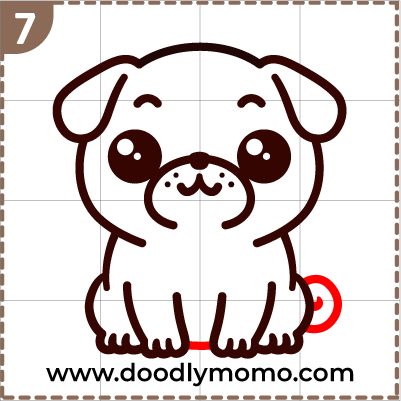
Step 7: Finally draw a curly shape for the tail, allowing your creative flair to shine through as you experiment with different curls and swirls. Take your time to refine this detail, ensuring it complements the overall design beautifully. And that’s that! Great job on completing your masterpiece! You’ve not only followed the steps but also imbued your unique style into the artwork.
Here are all the detailed steps for your easy reference, ensuring that you can follow along without any confusion as you work through the process. Each step is meticulously outlined to provide clarity, allowing you to navigate through the procedure with ease and confidence. By following this structured approach, you will minimize the chances of making mistakes and increase your efficiency as you progress. Feel free to refer back to this guide whenever you need a reminder or a clearer understanding of the process.
Did you know?
It’s believed that the name “Pug” came from the marmoset monkeys, which were popular pets in the early 1700s and had similar facial expressions to Pugs. They are known for their distinctive appearance with a short muzzle, curled tail, and muscular build. They were originally bred as lap dogs for Chinese emperors and were later popularized in Europe, even serving as a symbol for the Dutch royal family after one of them saved the life of Prince William of Orange. Pugs are also known for their affectionate and playful personalities, making them popular family pets. Pugs are also known for their snoring and are not known for being “lazy,” but rather are considered active and playful, despite their compact build.

Here’s some more kid-friendly information:
- Ancient Origins: Pugs are believed to have originated in China, where they were companions to emperors and the wealthy.
- Royal Affiliations: They became the mascot of the Dutch House of Orange after one saved the life of Prince William of Orange.
- Characterized by Playfulness: Pugs are known for their playful and affectionate nature, often displaying puppy-like antics well into adulthood.
- Relatively Healthy: While they are prone to some health issues common in brachycephalic breeds (like breathing problems), with proper care, they can live long and happy lives.
- Separation Anxiety: Due to their affectionate nature, Pugs can be prone to separation anxiety and thrive on human companionship.
📌We are in Pinterest too! Check us out and save our pins as reference! ♥
You can also check and buy vector files and images from our Adobe Stock link below, where you’ll find a diverse collection catering to all your creative needs, ensuring that you have quality visuals for any project, whether it be for web design, marketing, or personal use.
Thank you for reading! We hope you found this article insightful and enjoyable. Please have a look at our other step-by-step tutorials, where you can discover a variety of adorable dog breeds, complete with tips on training, grooming, and care. Whether you’re a seasoned dog owner or considering bringing a new furry friend into your home, our comprehensive guides are designed to help you along the way. Happy Drawing!


Leave a comment